Haki Scaffolding

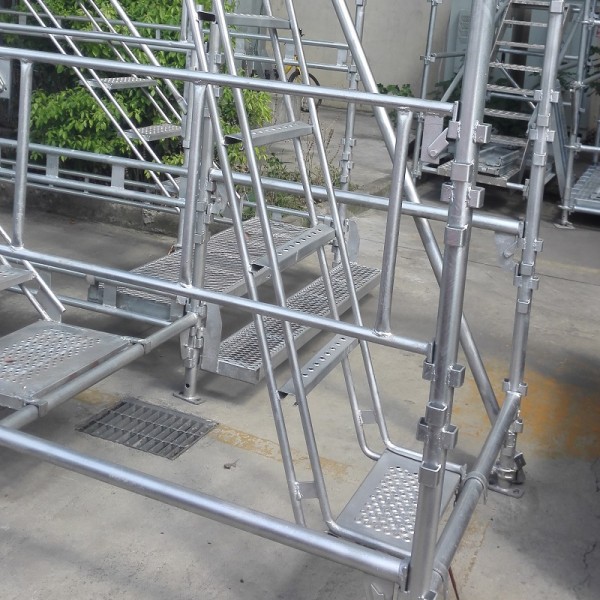
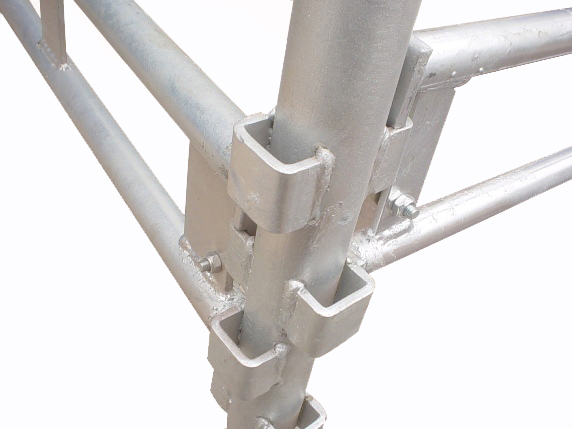
Haki Scaffolding is a type of universal modular, proprietary scaffolding that utilizes a locking-catch method of erection. Commonly known as a “hook-on” type of functionality, it can be used for a wide array of business sectors and industries.
It was developed in order to provide workers and personnel with the safest and most secure type of environment.


| Item # | Description | Unit Weight | Surface |
|---|---|---|---|
| 1019301 | Standard 300mm | 17.5 | HDG |
| 1019201 | Standard 2000mm | 12.1 | HDG |
| 1019151 | Standard 150mmm | 9.4 | HDG |
| 1019101 | Standard 1000mm | 6.8 | HDG |
| 1019051 | Standard 500mm | 4 | HDG |
| 1021300 | Ledger beam 3000mm | 18.7 | HDG |
| 1021400 | Ledger beam 4000mm | 23.3 | HDG |
| 1021250 | Ledger beam 2450mm | 14.5 | HDG |
| 1021190 | Ledger beam 1914mmm | 11 | HDG |
| 1021160 | Ledger beam 1605mm | 10 | HDG |
| 1021120 | Ledger beam 1200mm | 7.5 | HDG |
| 1022300 | Single tube beam 3000mm | 13.4 | HDG |
| 1022120 | Single tube beam 1200mm | 6.5 | HDG |
| 1022072 | Single tube beam 720mm | 4.7 | HDG |
| 1022160 | Single tube beam 1605mm | 7.9 | HDG |
| 1022050 | Single tube beam 3000mm | 4.3 | HDG |
| 1052302 | Guardrail frame 3000mm | 14.9 | HDG |
| 1052122 | Guardrail frame 1200mm | 7.8 | HDG |
| 1052073 | Guardrail frame 720mm | 5.3 | HDG |
| 1052162 | Guardrail frame 105mm | 9.7 | HDG |
| 1052190 | Guradrail frames Ledger direction | 11.2 | HDG |
| 1055300 | Safety gate with net 3000mm | 27 | HDG |
| 1055121 | Safety gate with net 1200mm | 21 | HDG |
| 1211070 | Bracket with spigot720mm | 8.9 | HDG |
| 1211050 | Bracket with spigot 514mm | 5 | HDG |
| 1211047 | Brackets 460mm | 2.2 | HDG |
Types of Haki Scaffolding
How to erect Haki Scaffolding
The process or method of assembling or erecting a Haki scaffolding system is slightly different from how traditional scaffolding is done. Don’t worry, here’s a quick step-by-step guide on how that’s done!
Step #1: Set the Erection Brace
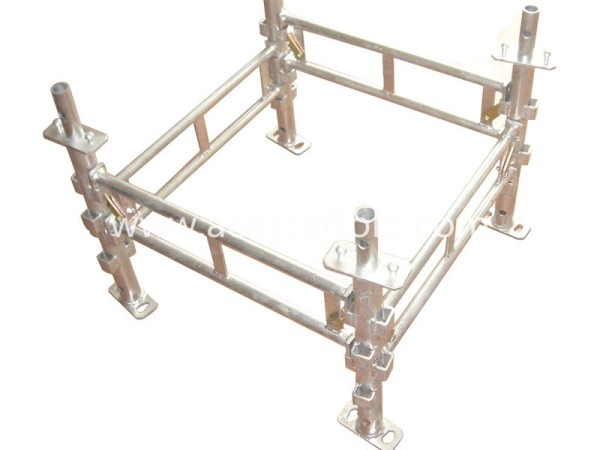
The first step is to set the erection base on the ground to make sure that it will be assembled precisely and accurately. You want to make sure that the measurements are exact in order to arrive at higher and better-quality results.
Step #2: Transport the Brace to the Scaffold Location
Once done, it’s now time to bring the erected brace to the scaffolding location where it’s going to be suspended.
NOTE: Before going onto the next step, a “safe zone” must be created and that’s done by attaching a guard frame to the erected brace.
Step #3: Install a Double Rider and Guard Frame
Then, using the safe zone, install a double rider and a guard frame for edge protection. This is what most traditional scaffolding systems lack.
Step #4: Attach the Board Bracket to the Beam Rider
Next would be to attach the board bracket to the beam rider. This step also involves the insertion of sprint pins to the puncheon unit in order to appropriately suspend the scaffold safely and securely.
NOTE: Before going to step 5, it’s advised to go down at least 2 meters.
Step #5: Use a Standard and Hook-On
Then, using a regular standard, hook it onto the bracket. This will then be pushed at the outside part of the area and lift it to the guard frame.
Step #6: Release the Edge Guard-Frame
By now, your suspended scaffolding should be tight, stable, and secure. If it is not, recheck everything from the beam riders, the brackets, and even the standards to see where the problem is.
That is how you properly erect a suspended HAKI scaffolding structure. For the benefit of the supported scaffolding system, though, it’s literally the same. You assemble the base, then you take and use a ledger, then a standard until you fully erect it.
